Sunday 30 December 2012

Constructing the Cressida Rose Part Five - Barricades

The final pieces for the Paddle Steamer Cressida Rose are the set of improvised barricades - emplacements for the 7 lb gun at the bow and a Nordenfelt machine gun infront of the Wheelhouse, and covered pallets for the top and lower decks.

Before undercoating
The heavy resin pieces were undercoated in white and then painted in flat colours with Miniature Paints.  I then used two layers of highlighting and gloss varnish.

The barricades painted in flat colours

The finished pallets

The bow emplacement for the 7lb gun

The barricade for the Nordenfelt gun infront of the Wheelhouse


The barricade manned
This final picture includes a 2p piece and a couple of Copplestone casting Naval Brigade miniatures for scale.


Saturday 29 December 2012

Constructing the Cressida Rose Part Four - Deck Buildings

The Redoubt Nile Paddle Steamer kit comes with three deck buildings in heavyweight resin - the wheel house for the top deck, the boiler room that goes below it on the lower deck, and the stern building that also sits on the lower deck.

My plan was to go for a slightly weathered/worn and torn look for Cressida Rose but nevertheless with a smart(ish) white paint job.  To that end I undercoated the buildings in matt white and planned to achieve shading effects using brilliant white for highlighting and a gloss varnish that would colour the white slightly and hence provide some shading.  I also liked the look of the slightly rough resin finish (simulating paint having bubbled in the heat of the Sudan/Congo) so deliberately didn't file down the bobbles on some of the pieces.

The undercoated buildings
After undercoating I painted the basic flat colours onto the buildings using Miniature Paints (Burgundy for doors, Royal Blue on the windows, Leather Brown on the woodwork and Matt Black for the boiler).

Flat base colours done
Next up was to highlight the main paintwork in a brilliant white and paint two levels of highlights onto the coloured areas (and drybrushing dark grey on the boiler).  The stairs and roof of the Wheelhouse were inked too.
Post-paint, pre-ink and varnish
To finish, the pieces were gloss varnished to match the rest of the model.

Boiler room as seen from the port-side

Boiler room from starboard

The boiler itself

The Wheelhouse from the bow
The Wheelhouse from the port side


Finished buildings

Next up, barricades...


Friday 28 December 2012

Constructing the Cressida Rose Part Three - Paddle Wheel

The paddle wheel and smokestack were straightforward to paint - spray undercoat with matt black, drybrush in dark grey and highlights in gold.

The resin and metal piece assembled with epoxy resin and after a fair amount of filing/sanding
The Paddle wheel sprayed with matt black car primer, dry brushed with dark grey, and with rivets highlighted in gold
The piece varnished and fixed to a plasticard base with ready mixed filler sculpted as river water


The finished Paddle Wheel
 I affixed the paddle wheel to some plasticard and built up the 'water' with ready mixed filler.  This was painted with a base of Royal Blue (Miniature Paints) and then drybrushed in successive lighter shades of Vallejo blues, with final highlights in white.  The whole piece was gloss varnished to finish.


Wednesday 26 December 2012

Constructing the Cressida Rose Part 2 - All Decks on hand...

First task after assembling the various pieces was to sort out the decks.  I undercoated the bottom of the pieces in matt black car primer, and the top and sides in white car primer (the bottoms will never be visible in the finished model).
Undercoated
Stage one was to paint the metallic areas given that the drybrushing would probably be a bit messy.  The mooring bollards were undercoated in chocolate brown and drybrushed brass (both Miniature Paints), the grilles undercoated in matt black and drybrushed in Chainmail (again Miniature Paints).

Metallic areas painted
Once the metal areas had dried I then painted the wooden decks in a dilute Leather Brown, leaving the hull and side areas in white.

The decks painted in almost a wash of Leather Brown
Next stage was to ink the decks.  One coat in Chocolate Brown ink, another (once the first had dried) in Chestnut Brown ink (again, both Miniature Paints).

The decks inked.
Once the ink had dried I highlighted all the white paintwork in matt white acrylic.  The final job was to varnish the pieces.  I always use heavy duty polyurethane yacht varnish for my models to give them a suitable 'toy soldier' finish.  The wood areas were varnished with an older varnish that through contact with the air over at least a couple of years has developed quite a brown stain.  The metal grilles and white paintwork was done in clear gloss varnish.
 
The finished decks
Overall they came out pretty well I think, the repair jobs on the resin will be hidden by the deck buildings.  Next up, the deck buildings themselves and the paddle wheel and funnel...

Friday 21 December 2012

Constructing the Cressida Rose Part 1

Andy and James were kind enough to get me the awesome Nile paddle steamer set from Redoubt Enterprises by way of a combined birthday and Xmas present this year.  The kits is fantastic, a rear-wheel paddle steamer with two decks, complete with crew, naval brigade, infantry and heavy weapons.  It's around 18" long and 4" wide, the boat itself usable for games set in the Sudan and also with some poetic license in Darkest Africa (up the Congo), and the figures at home facing Fuzzy Wuzzies or Zulus.  Today saw the first stages of construction of what will become the steamer Cressida Rose.

The Redoubt illustration of the product looks like this:

Redoubt's catalogue illustration of the completed steamer
The parts came well packed but with the larger, flatter resin pieces cracked into a couple of extra pieces.


The other parts of the steamer were cast in a heavier resin and required very little cleaning up.

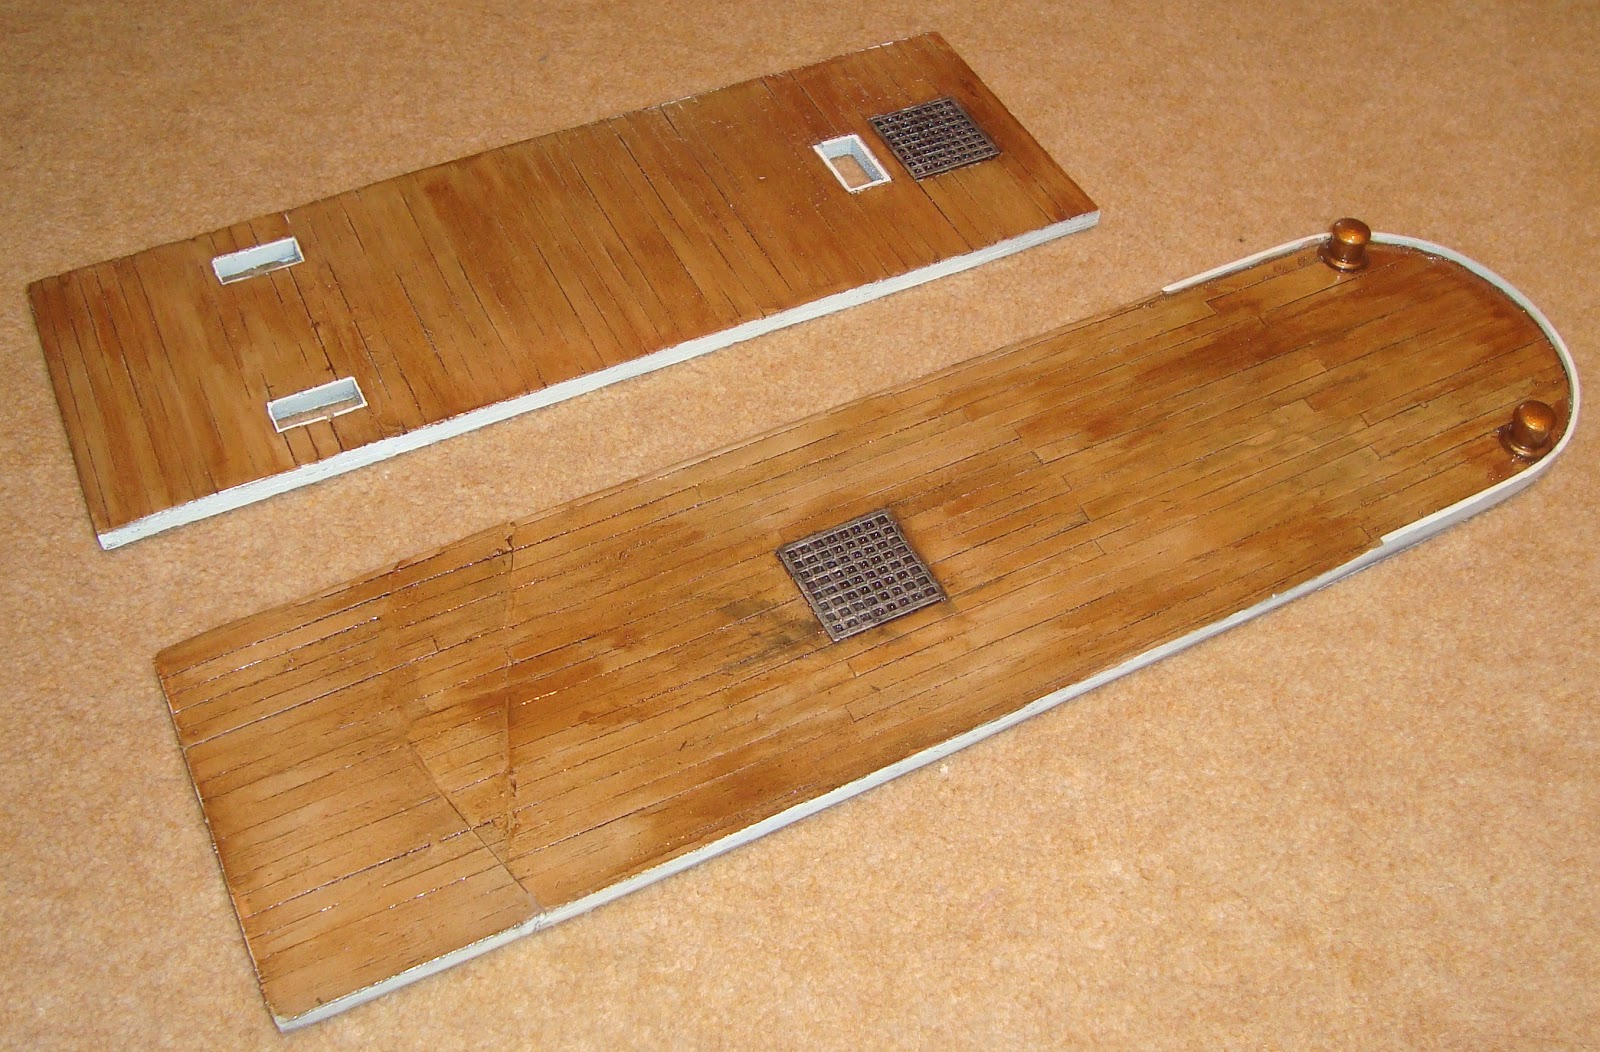
Deck buildings at the top, paddle wheel minus blades to the left, and barricades at bottom
The first job was thus to glue the flat resin base pieces back together with epoxy.  Having done this, putting the pieces together showed the overall look of the model:


The component parts fit very well so I've decided not to glue the complete model together but instead keep it separate - which should be easier to store and which will allow the use of the barricades etc for other games (eg a Rorkes Drift type scenario).  It's heavy enough that, with a couple of bits of blu-tack, it should be robust enough to survive on the wargames table.

Last job today was putting the paddle wheel and shafts together, which required some filing and more epoxy. I plan to base this on some plasticard and model the churned up river waters with ready-mixed filler.


Tomorrow I'll do the spray undercoat for all the pieces if the weather is dry enough.