First task after assembling the various pieces was to sort out the decks. I undercoated the bottom of the pieces in matt black car primer, and the top and sides in white car primer (the bottoms will never be visible in the finished model).
 |
| Undercoated |
Stage one was to paint the metallic areas given that the drybrushing would probably be a bit messy. The mooring bollards were undercoated in chocolate brown and drybrushed brass (both Miniature Paints), the grilles undercoated in matt black and drybrushed in Chainmail (again Miniature Paints).
.JPG) |
| Metallic areas painted |
Once the metal areas had dried I then painted the wooden decks in a dilute Leather Brown, leaving the hull and side areas in white.
 |
| The decks painted in almost a wash of Leather Brown |
Next stage was to ink the decks. One coat in Chocolate Brown ink, another (once the first had dried) in Chestnut Brown ink (again, both Miniature Paints).
 |
| The decks inked. |
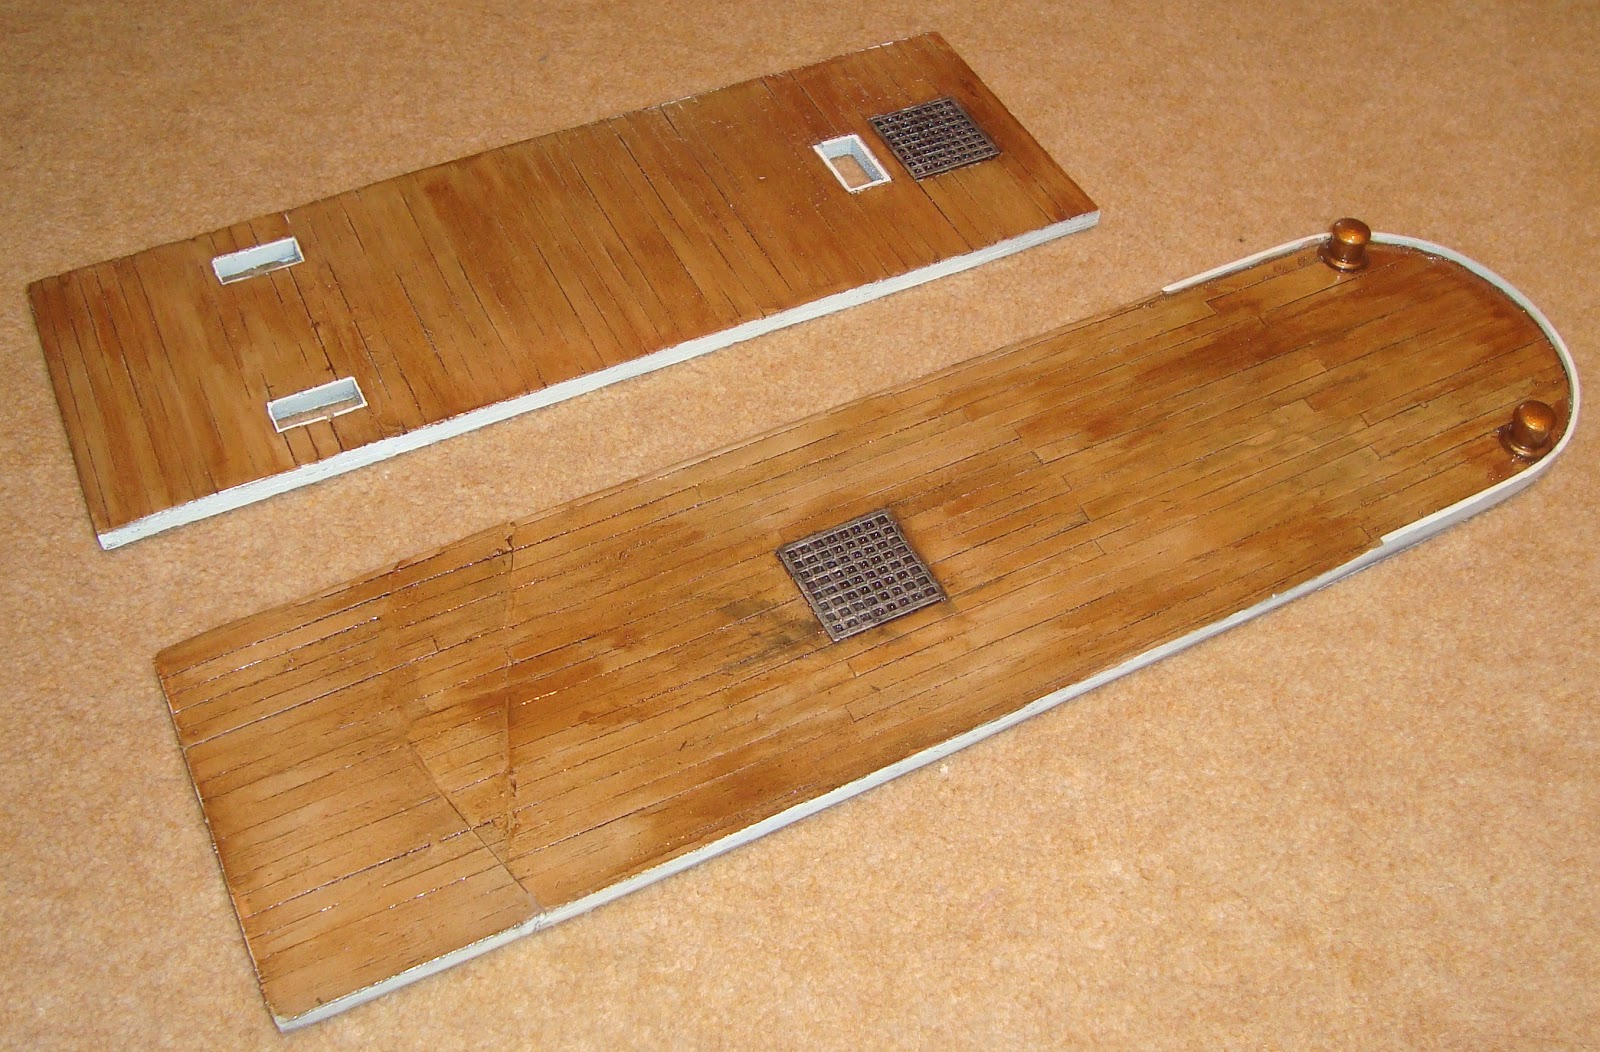
Once the ink had dried I highlighted all the white paintwork in matt white acrylic. The final job was to varnish the pieces. I always use heavy duty polyurethane yacht varnish for my models to give them a suitable 'toy soldier' finish. The wood areas were varnished with an older varnish that through contact with the air over at least a couple of years has developed quite a brown stain. The metal grilles and white paintwork was done in clear gloss varnish.
 |
| The finished decks |
Overall they came out pretty well I think, the repair jobs on the resin will be hidden by the deck buildings. Next up, the deck buildings themselves and the paddle wheel and funnel...

.JPG)


No comments:
Post a Comment